
The bench press is a fantastic whole-body exercise that allows us to lift very heavy loads with our upper body. Often the bench press is given a bad name due to the shoulder issues that some folks have with the exercise. At Brentwood Barbell, we aim to have every athlete we work with perform some version of the bench press. Let’s look at how we teach this classic strength exercise.
Bench Press Context
You’re probably not a powerlifter if you’re training at our gym. Most of the folks we work with are everyday folks that want to build muscle, get rid of pain, and look better around the pool. They might also be more concerned with continuing to live an active lifestyle. In any event, we’re not going to be discussing the bench press in terms of powerlifting here. We’re looking at the movement for basic strength production. As such, we’re going to encourage a long(er) range of motion than might be advocated for when looking to win a meet.

Teaching Progression: The Bench Press
Step 1 – set the shoulders in retraction
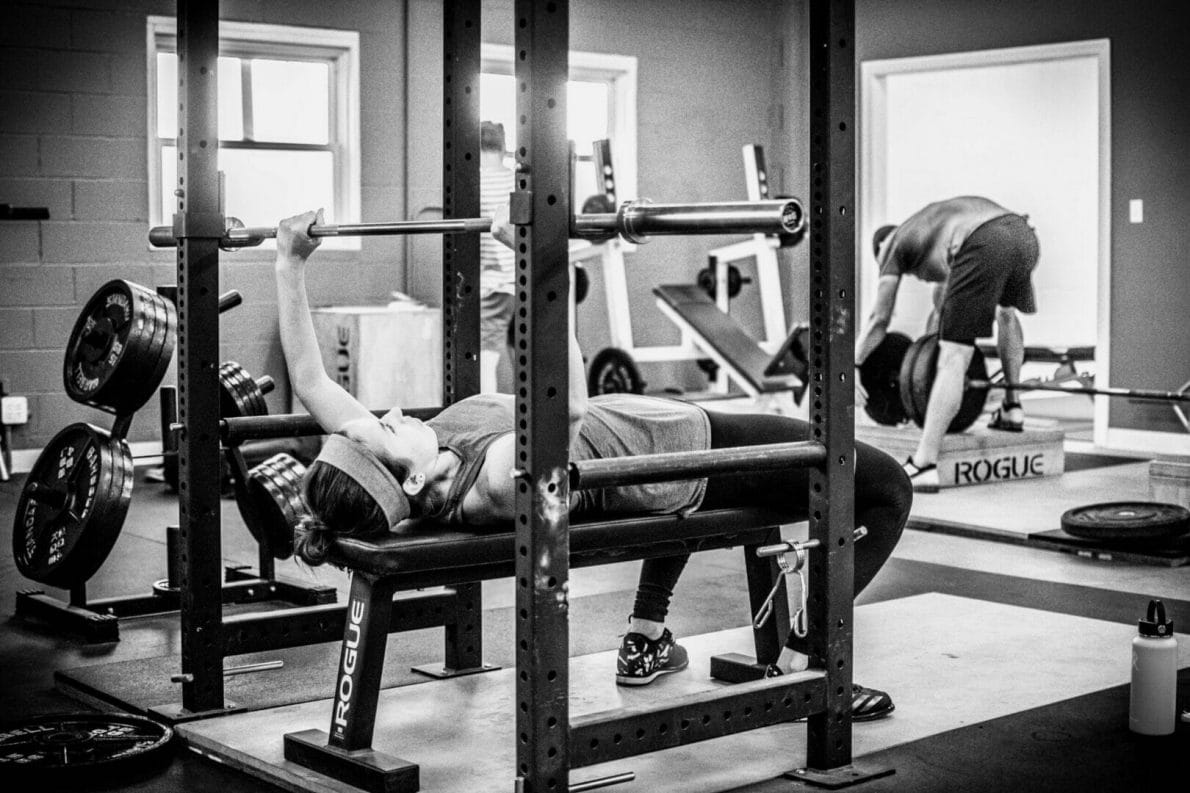
Sit on the edge of the bench in a tall posture. Squeeze your shoulders together and lift your chest. In this posture, notice the increased back arch. This position will be your final adjustment prior to bringing the bar out of the rack, it’s simply easier to teach while sitting up.
Step 2 – set the bar
Lie flat on the bench and roll the bar to the end of the hooks. Once the bar is set you will need to position yourself so that your eyeballs are directly under the barbell (note: The bar height should result in a slight elbow bend but allow for easy racking / un-racking). For further context, we use R3 power racks at the gym, if you’re using a different set up you might need to adjust the specifics here.
Step 3 – set your grip
Grab the bar (men pinky on the inner 1/8” ring, women thumb length from knurling) placing it in the “lifeline” of your palm. This grip will place the bar over the “bones of the wrist”. We encourage our lifters to maximally press the pads of their fingertips into the barbell. This position is commonly known as the “bulldog grip” and helps most lifters get the bar into the optimal position.
Step 4 – set your feet
With your hands set on the bar, walk your feet back as far as possible until the heels rise approx. 1” off the platform. Push your heels into the floor, your back should now be tight and feet pressed firmly into the floor. We will refer to this set up as “leg drive”. This leg drive will help stabilize the pelvis and minimize wiggling under a heavy barbell.
Step 5 – set your back
Pinch your shoulders together, actively tighten your back muscles. Once you’ve established a baseline level of compression (tightness) in your back segment, we often instruct clients to “crawl” their shoulders down toward their hips to get even tighter. Finally, drive your heels into the floor to stabilize this very tight position.
Step 6 – bar path
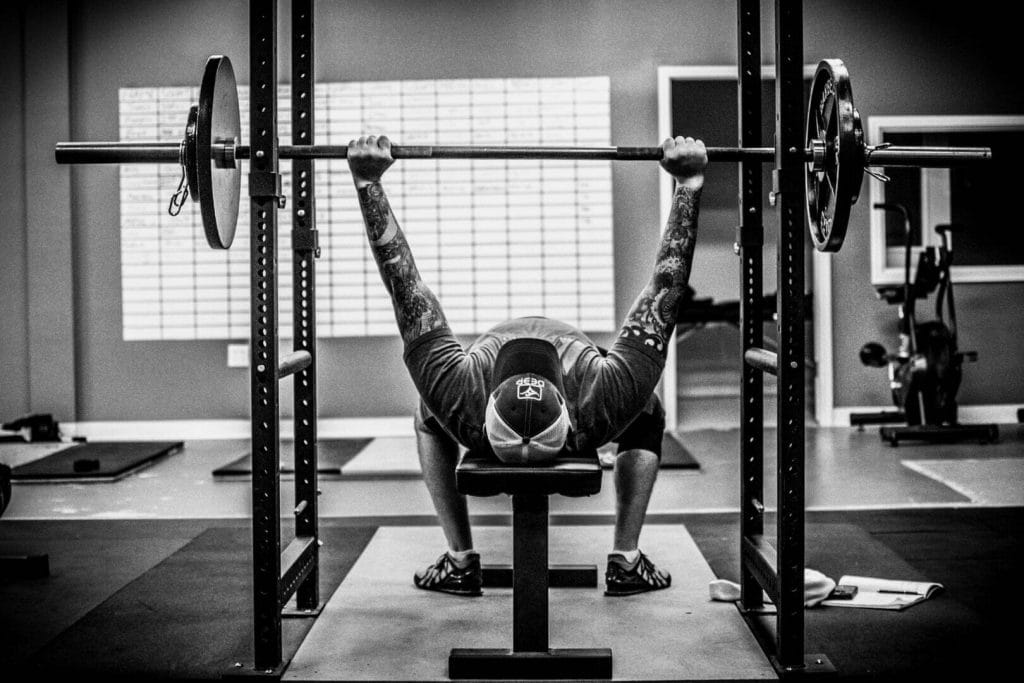
Bring the bar out of the rack and place it directly over the shoulder joint. Look closely at the ceiling, see where the bar interacts with a visible landmark above you. This will be your focal point during the set, you will use your peripheral vision to return the bar to this proper position. Take a big breath and lower the bar to your mid sternum. Pause in this position for a couple of seconds. A proper bottom position will result in vertical forearms and elbows placed slightly in front of the bar. Push the bar back to the starting position (use your mark on the ceiling) and repeat for 5 more repetitions.
From here, simply repeat the process adding a little weight each set of 6 repetitions. Once you’re comfortable with the touch point on the sternum and the associated elbow / forearm mechanics, you can speed up the bottom position by lightly touching and pressing the bar back up. We are looking for a weight that presents a little challenge but allows for perfect technique. This is usually represented by the point at which the lifter “slows down”.
Coaching vs. Cueing
The process above isn’t rocket science but it does take a few biomechanical concepts into play and most importantly, it summarizes the process of learning this new skill into bite-sized chunks of information the athlete can tolerate.
When we teach an athlete to bench press (or any other lift), we generally work through a few learning stages. First, we do a lot of explaining while we work through the steps. During the first run through the 6 steps above, there would be a lot of discussion and nuance covered. However, as the athlete moves through the progression each time, there would be less and less talking from the coach. Eventually, the coach would only use short, single word cues. This is done to allow the athlete to learn the skill… they need to mess it up a bit to get better at it. Cueing also allows the athlete to move. To much talking results in too little action. Reps are the best teacher here.
Common Errors
Error 1 – flat back bench pressing
A flat bench posture usually results from a lack of lumbar erector contraction and leg drive. To illustrate this position, we place a towel roll under the low back. Focus on “pulling your back off the towel”. In some cases, the athlete will not be able to arch their back due to natural orthopedic limitations or perhaps height. In those cases, we do the best we can with the resources we have.
Error 2 – ineffective bar path
Hold the top position, push the bar a little too far toward your hips and feel the awkwardness, now push the bar a little too far toward your forehead, again feel the awkwardness. Now, find the middle position, placing the bar directly over the shoulder joint. Perform the next few reps with a slower tempo so you can “feel” the bar position change as it goes from over the shoulder to the mid sternum.
Error 3 – poor elbow positioning
A flare is often the result of a flat back posture (see error #1), grip width is also important. We want a grip width that results in vertical forearms under the bar. Finally, try “tucking” your elbows in a little as you bring the bar down toward the sternum. Remember to keep the back tight.
Error 4 – not taking a big breath
The universal problem. The best advice here is to simply equate breaths and reps. In fact, a big breath is part of a proper rep. 6 reps will yield 6 big breaths. As with the arch error above, some athletes may have medical advice to not hold their breath. In those circumstances, we work with the resources we have.
Wrapping it Up
In closing, the bench press is a great strength exercise that incorporates the entire body. When we are able to lift heavy loads, we are able to generate a great strength / muscle building stimulus. We would advocate for nearly every program to have some version of the bench press in it. Even if (perhaps, especially if) you have shoulder pain or a history of shoulder pathology.
If you’d like to learn more about better lifting, or how to make the bench press work with your shoulder history, you can BOOK a MEETING HERE. One of our coaches will follow up with you and we’ll see what we can come up with.
You can also join our FB group: Strength, Health, and Nutrition in STL. Jump right into the conversation and get the feedback you need!
Talk soon,
James