
How to Low Bar Squat
In this video we cover our teaching progression for the low bar back squat. We’ve also included a helpful video so you can watch / learn the progression in real time. To get the most out of this article, I would recommend watching the video first, reading the material, then watching the video again. Complete this cycle as many times as needed for you to confident in your set up next time you head to the gym.
Article Outline
(1) A Note on the Low Bar Squat
(2) The 5-Step Set Up
(3) Errors and Corrections
A Note on the Low Bar Squat
We love the low bar squat at Brentwood Barbell. We love it for several reasons. (1) We think the movement is accessible to a broad range of individuals coming in to work with us. (2) We also think folks can move a significant amount of weight in the movement and ultimately handling a significant amount of weight will lead to a more robust training effect. What we don’t necessarily care for is the debate of high bar squatting vs. low bar squatting. This argument is largely baseless and at the end of the day doesn’t produce a substantial difference one way or the other. You can get plenty strong squatting with the bar in a high or low position. While our “go to” strategy is the low bar squat, we ultimately want the client to use the type of squat that allows for the most frequent, pain free training.
The 5 Step Set Up
Step 1 – The Stance
Place your heels at a “shoulder’s width” distance apart. Begin with your toes pointed outward approximately 30 degrees.
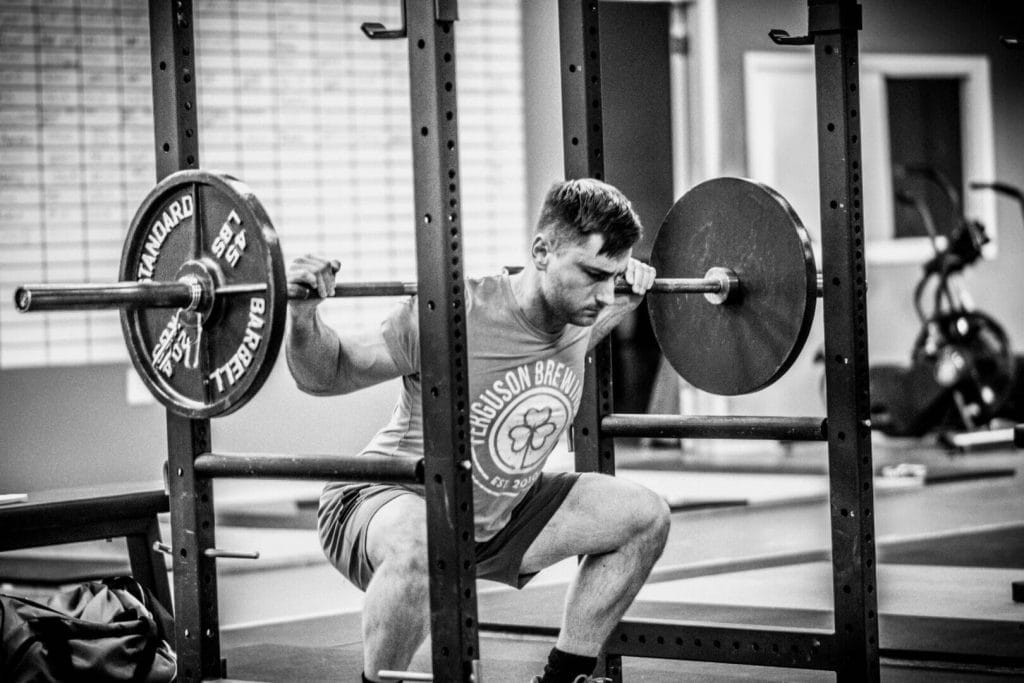
Step 2 – The Bottom Position
Squat down, using the elbows to push the knees out into the proper position (pointed in same direction as the knee cap and placed mostly directly over the ankle). Your feet should be flat on the floor and your sternum pointed at the floor.
Proper depth will place your hip crease just below the top of your knee. You can wiggle your feet around a little until you find the exact stance that makes proper depth the easiest to achieve.
Step 3 – Hip Drive
Once you’ve established a proper bottom position, practice standing up out of the squat by emphasizing driving through the hips. Our coaches will usually place their hands on your tailbone to help you get a better understanding of how to “drive” your hips up out of the squat. This will take some practice and it’s important to note that while your emphasizing driving your hips, your shoulders are still coming out of the hole at the same rate. We’re not looking for the hips to rise faster than the shoulders. You will need to watch the video several times to clearly understand this.
Step 4 – Bar Placement
At this point we actually need to place the barbell in the rack and get squatting with it. Place the barbell so it’s approximately mid-sternum height when resting in the rack. Take a false grip on the barbell (thumbs on top of the bar), pinky fingers located on the inside 1/8″ ring on the bar (women may prefer a more narrow grip). The bar needs to rest between the spine of your scapulae and the posterior deltoid (shoulder muscle). This positioning will create a “nook” for the barbell resulting in a secure, tight rack position. A common mistake is to place the bar deep in the hand, instead, we want the “heel” of the palm to contact the bar directly. This will minimize unnecessary torque or moment on the wrist. You will need to watch the video several times to clearly understand this.
Step 5 – Squat
Get under the bar, pull your chest up (get your back tight), straighten your wrist. Step back out of the rack and set your stance (revisit step 1 if you’re unsure of your stance). Squat down by bending the knees right away and pointing your chest to the floor. Do not pause in the bottom, simply move slow and steady to feel the positions.
From here, simply repeat the process adding a little weight each set of 6 repetitions. We are looking for a weight that presents a challenge but allows for perfect technique, often represented by a “slowing down” of the lifter during his / her work sets.
Common Errors and Corrections
Let’s now cover a few major errors in the low bar squat technique. Of course this list is not exhaustive, that would be impossible. Presented here are some of the more common issues that we see.
Error 1 – Leading with the chest (no hip drive)
There are several “fixes” here but the most effective one we’ve found by far is to follow two very simple cues: bend the knees immediately and point your chest toward the floor.
Error 2 – Inadequate depth (proper depth is hip crease below top of the patella)
A squat that is too deep will often be due to the back angle being too vertical. A squat that isn’t deep enough will often be the result of inadequate stance width. Revisit step 1 in the teaching progression. Simply sit into the bottom of the squat, spend some time here and find the position that results in perfect depth with minimal effort.
Error 3 – Pausing in the Bottom
Sometimes we pause in the bottom of the squat, when we do we call it a paused squat. For our squat however, we don’t want to pause as we’d like to take advantage of the stretch reflex in the bottom. This is an important component of squatting as it helps us lift heavy weights. It’s often helpful to slow down without stopping, this will help you feel the bottom positions and muscle stretch. The more you feel this position the faster you’ll be able to move through it.
Error 4 – Knees not Tracking Toes (i.e. knee valgus)
Revisit step 1, the bottom position. Place your elbows on the inside of your knees. Use your elbows to shove your knees outward. You’re working for the position that places the knees directly over the feet, pointed in the same direction as the toes.
Another trick I often use is that once we have this position, I’ll instruct the client to attempt to pull their knees off their elbows. At this point they realize how weak their hip rotators are. That is fine, they will get stronger with proper squatting. It’s more important to feel what we’re talking about.
Error 5 – Knees Slide (forward movement of the knees in the bottom)
There are multiple scenarios as why this is happening. The most common reason we find is an incorrect back angle (too upright), resulting in a “rebound” out of the bottom. Rather than utilizing the stretch reflex from the posterior chain muscles (hamstrings, adductors) the athlete is relying on their knee joint. This works fine in high bar and front squatting but leads to problem in the low bar squat.
Revisit our “bend the knees immediately and point your chest at the floor” concept. We find that the more delay there is in knee bend to start the squat, the greater the knee slide is out of the bottom.
Question? Drop us a line, we love helping people pick up barbells!
[pirate_forms]